

- 400-090-9199


Swan DIY2.2
$ 299.99
Postage : $0.00
Speaker Driver Speaker Cabinet Kit
Stock:
0
【Features】
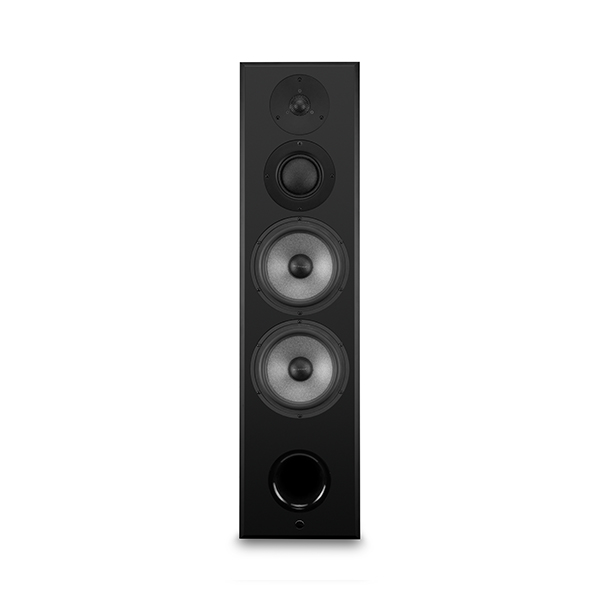
●Diy2.2 bookshelf box adopts two-way four-stage inverted speaker system, which is exquisite and beautiful in appearance and easy to make.
●The woofer adopts Swans D6 advanced speakers. The outstanding features of the D6 unit are the use of relatively large vibration mass integrated high-strength and high-internal resistance composite material diaphragm, natural rubber ring, Kapton high-power 76mm large-diameter voice coil, long-stroke dynamic design, symmetrical driving magnetic field, cast aluminum Basin stand, and fatigue-resistant centering support.
●Tweeter adopts German natural fiber high damping composite dome diaphragm, high temperature resistant aluminum alloy frame with CCAW wire, the sound is sweet and delicate. The cabinet adopts the inverted design, and the low frequency is more prominent.
●Flat frequency response curve, excellent sound performance and good balance.
●Adhering to Swans' excellent parameter optimization design, it fully expresses accurate imaging, wide sound range and amazing dynamics.
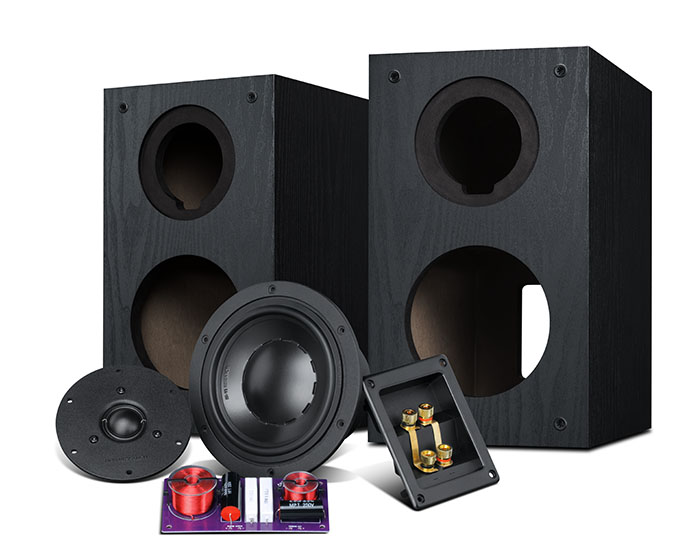
【Kit List】
1--woofer: D6.8-IIB 2PCS
2--Tweeter: Q1R 2PCS
3--Frequency divider: FP-HiVi DIY2.2 2PCS
4--Inverter tube: 2PCS
5--High-current speaker wire connected inside the speaker: 1
6--junction box: 2PCS
7--Sound-absorbing cotton: 1 piece
8--Buffer: 8PCS
9--Sound box sign: 2PCS
10--Screw: 4 0 PCS
11--Speaker surface mesh plug-in: 8 sets
12--Cabinet: 2PCS
13--Kit Instructions: 1PCS
【Product curve diagram】


【Key points of kit manufacturing】
【Tool requirements】
Screwdriver, 3mm drill, 40-60W soldering iron, hexagonal wrench, Phillips screwdriver, sealing glue.
[The first step: box production]
Please process in strict accordance with the dimensions given in the drawings.


【Step 2: Install the frequency divider】

1. Compare the corresponding length to intercept the fever wire and the welding divider connection in the box;
2. The welding polarity must be correct; (the red line of the general fever line or the word is the positive pole, and the silver-white line or no word is the negative pole)
3. Install the frequency divider on the rear box panel (or side panel) opposite the opening of the corresponding unit, and pay attention to adding a square buffer.
【Step 3: Install the junction box】

a. Take out the junction box, turn it over to the back of the junction box, you can see that there are four soldering lugs, marked with "+, -", divided into upper and lower groups.
b. Pass the "positive" and "negative" fever wires of the input end of the bass crossover through the opening of the box junction box and out of the box board, and weld them to the "+, -" solder lugs of one group of the junction box respectively.
c. Pass the "positive and negative" pole fever wires of the input end of the tweeter from the opening of the box junction box, and weld them to the "+, -" solder lugs of the other group of the junction box respectively.
d. Confirm that there is no short circuit or virtual welding between the wire ends and the solder lugs, and then fasten the junction box (gasket) to the box with screws (note that the terminal is upward, that is, "left negative, right positive") .
【Step 4: Fill with sound-absorbing cotton. The filling ratio is: 30%]
[Step 5: Solder the internal wiring and install the speaker]
a. The welding polarity must be correct. Generally speaking, the terminals of the speaker unit are marked with positive (+), negative (-) marks or rough subdivisions (the thick end with red dots is positive, and the thin end without dots is negative).
b. Buffer pads must be added to install the speakers and they must be leveled and pressed to prevent air leakage.
c. During installation, the mid-high frequency panel should be at the same level as the outer surface of the speaker, so that a flat mid-high frequency sound pressure curve can be obtained.
[Step 6: Install the inverter tube, signs, etc.]
1. Cut the inverted tube according to the given size. Note: The length of the reverse tube is: 140mm. The length is a reference value, which can be fine-tuned according to the actual listening conditions and habits.
There are two ways to adjust: a. Adjust the inverted tube. You can lengthen or shorten the length of the inverted tube to adjust the amount of low frequency. Generally, the longer the inverted tube is, the deeper the low frequency is, and the shorter is more powerful.
b. You can also adjust the amount of low frequency by adjusting the amount of sound-absorbing cotton. Generally speaking, the design idea of Swans products is to have a little more low frequency. If you like music with pure tone, you can add more sound-absorbing cotton to reduce the low frequency.
2. When installing the inverter tube, it is necessary to apply sealant at the position where the inverter tube contacts the box plate.
3. Sticker
a. The sign is a sticky design, just tear off the protective film on the surface, do not touch the dust to avoid the sticking is not strong.
b. The sign can be directly installed on the face net.
c. Select the middle position of the bottom of the surface mesh to paste it to ensure the appearance.
No relative downloads now.
Guess you like
